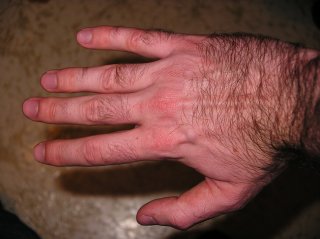
Back in the days around the time of the release of the first X-Men movie on DVD, I heard that the actor who played Wolverine (Hugh Jackman), in order to fully flesh out the sideburn-awesomeness of the character, had to have extra fake hair pasted on his own sideburns around his ears. Being the virile, hairy young man I was (Still am!), I reckoned I would have little trouble growing the necessary fleece. That is, if I ever had the inclination to.
Several years later I was invited to a costume party, the theme being “Superheroes and Supervillains”. This was the perfect opportunity to test my facial-hair-growing power: I decided to go as Wolverine! So over the course of a month the thin goatee I had was joined by big mutton chops.
But that's not what this article is about. The really cool thing about Wolverine, of course, is not his facial hair. (Though, you have to admit, that is a pretty cool do.) No, the really cool thing is his adamantium claws. Now, in this respect, me not having had an adamantium skeleton grafted to my body at some point during my previous life meant that reproducing the claws convincingly was going to be a bit of a challenge. Nevertheless, I pulled it off. Here's how I did it.
Unfortunately, at the time, my personal supply of adamantium was running low, and when I asked the hardware store if they were getting any in soon they told me to “keep away from the spraypaints”. So, to make do, I chose a cheaper alternative. The claws would be made of wood, something light and only a few millimetres thick, cut, shaped and painted silver. I stole an idea from the movie, and planned on having the claws fit between and around my knuckles with a grip connecting all three claws hidden in my palm. There wouldn't be anything visible from the top side.
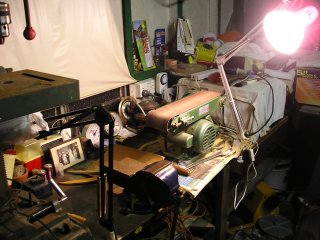
I found some scrap wood pieces with the help of my granddad. We managed to extract a small belt sander from under a big pile of junk in Granddad's garage, and set up a small work area.
Initially I prototyped the claws using cardboard, to find the right shape and size both around my knuckles and of the blades themselves. I cut out a couple of shapes in thick cardboard to get the general shape and size of the blade to something I was happy with. Also, using thin cardboard, I made several shapes that fit snugly in between my knuckles. This took a little bit of tweaking to get just right.
Combining these templates, I drew out six sets of claws onto the sheet of wood. “Enter the coping saw!” I hacked out the shapes, trying to avoid splitting the wood in the process (which, if I recall, wasn't always successful).
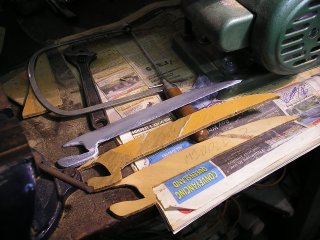
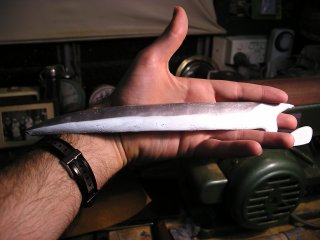
With the basic shapes cut out, you can see the claws coming into shape. At this stage, though, they were looking a bit blunt. Not at all like the sharp knife-like edges I was aiming for; certainly not sharp enough to cut through steel, although I had my doubts that steel cutting would be one of the party games (it really wasn't that kind of crowd). At this point is where the belt sander made its mark. There is quite possibly a more sensible way to do it, but instead of doing whatever that was, I just went ahead and sanded the bejeezus out of the claws-in-progress, down to points at the top, bottom, and tip.
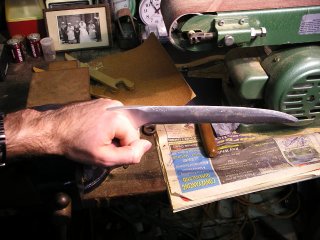
I had to be careful here, especially when sanding the tip. The angle of the grain from the way I'd cut the wood meant that as soon as the tip got close to really sharp, it would just break off. It did that a couple of times, setting my progress back a step.
Eventually satisfied with the shape, sharpness, and fit, and as I was running out of wood, the painting began. I bought a can of silver spraypaint to use for this (Hah! You can't tell me what to do, hardware store guy!), but it became evident on test pieces that the grain of the wood was so deep that it would be clearly visible through the paint. I needed some sort of filler that would make the surface smooth enough such that the silver would look reasonably like a smooth metal surface.

My first solution was an idea I stole after observing my dad's fibreglass painting adventures. I bought another can of spraypaint: standard white. It didn't really matter what the colour was, but I thought that'd do. By testing on a piece of scrap, a coat of white paint, sanded smooth with fine grain sandpaper, and then coated over again with the silver proved to be quite effective. I applied the strategy to the claws-in-progress, but after a couple of attempts it became obvious that there were some large pits in the wood that were just too deep to be filled by paint.
I couldn't really sand the wood itself down—that'd take far too long and would probably end up making the claws too small. But, I had plenty of sawdust around, and glue. So, I mixed up a sort of sawdust paste and smeared it across the blades of each claw. This had the effect of filling up large pits and making the whole thing easier to sand smooth.
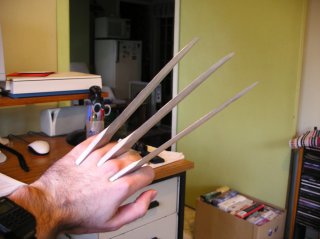
With this sawdust paste, sanded, undercoat, sanded, and silver coat, I had myself a pair of nice looking blade triplets. Constructing crude masks around the silver I had already painted, I sprayed the grip pieces a sandy skin-like colour to make it that much more difficult to see at distance, even if my palm could be seen.
Incidentally, those grips ended up kinda tight. So tight that the claws stayed put almost totally, even under their own full weight. The snug fits were not terribly uncomfortable, but were tight enough to leave marks between my fingers after taking them off.
So after the blades were done, I had to figure out how to get the three claws on each hand to sit together, and not wave about independently. I had initially envisioned drilling a hole through the palmed part of each claw and pushing a wooden rod through all at once. It occurred to me that this would be both difficult for me to get aligned right, and not really particularly effective even if I did.
After thinking about this for not very long at all, I settled on gluing and nailing some small wooden chunks between each claw. This also proved difficult to get right, but after some persistence I got it aligned as well as I wanted. It worked altogether pretty well.

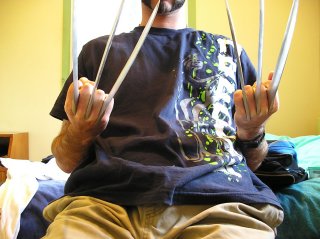
The claws were finished, and all that was left was easy. Some hair work, shaved my goatee, and added some street clothes—jeans, white T-shirt tucked in, belt; I used a shot from X-Men 2 for reference.
Now I was Wolverine.
Incidentally, pretty much everyone at the party picked it straight off, so I must've done something right.
Coming back to the initial question, by the way, I think I know why Jackman needed the extra hair. That's not to say I needed it, but I can see where an easy boost like that would help the overall Wolverine look.
I kept the chops for months afterwards, albeit in a more subdued form. They kinda grew on me.
See the follow-up: The return of the claws.
Comment to add? Send me a message: <brendon@quantumfurball.net>